


Annual License Update
All drivers with an out-of-state driver's license must update their driving record annually.
How to Upload an Out-of-State Driver Report in SAP
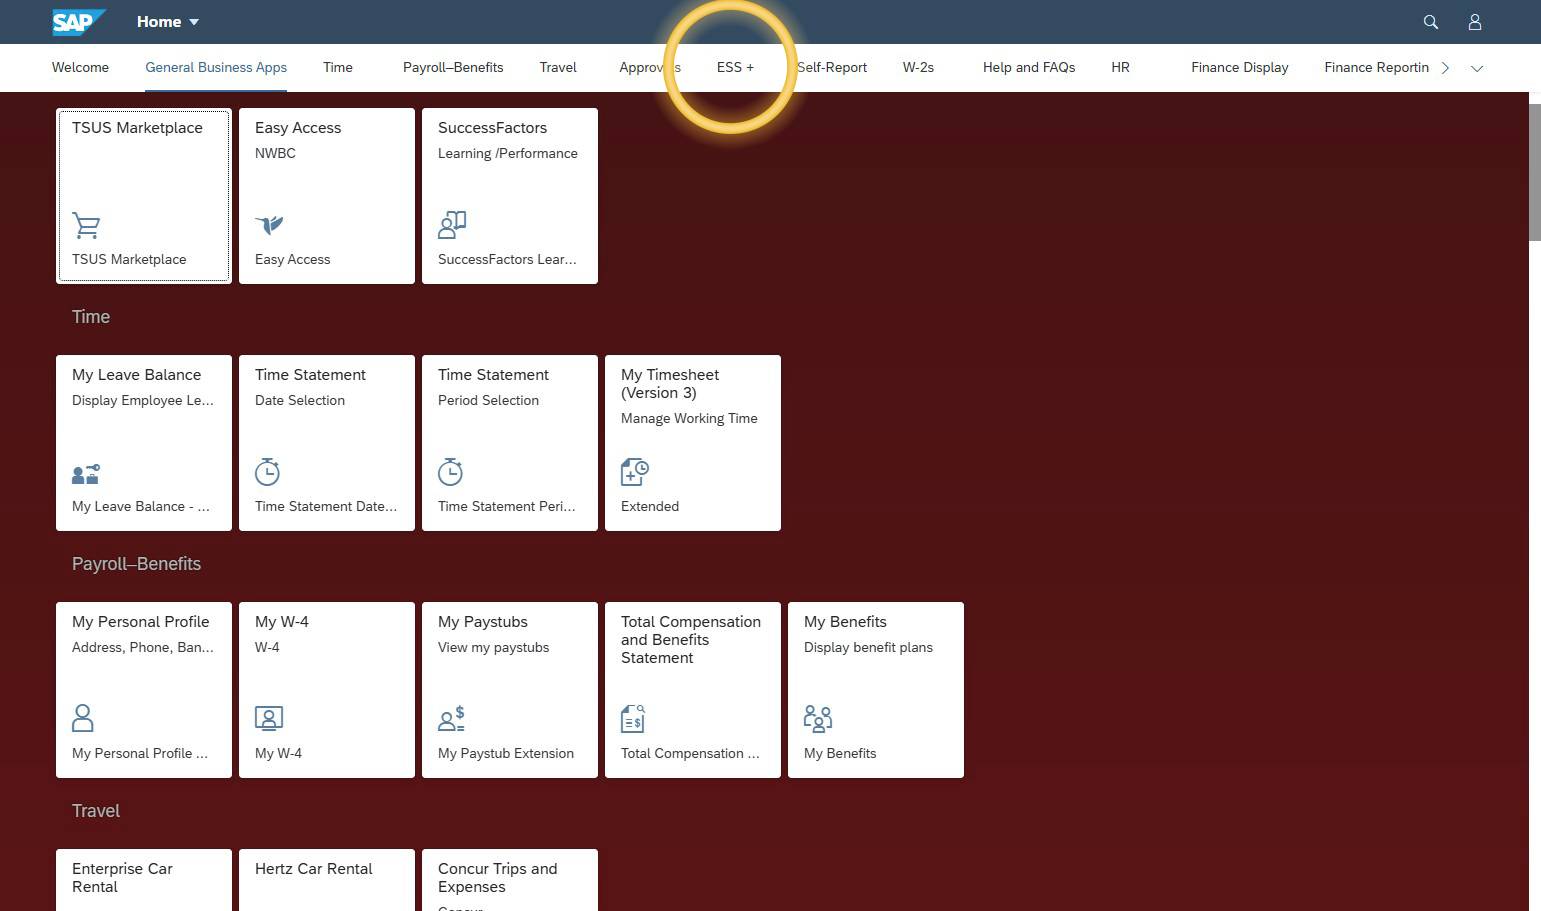
Step 3.2 - Navigate to ESS+
Step 1: Confirm
Confirm you are eligible to use an out-of-state driver’s license for TXST driving.
Before you upload a driving record, make sure you are driving under the type of license that matches your situation. Use the guidelines below to confirm whether you should be using a Texas or out-of-state driver’s license for TXST driving.
- Texas-based faculty and staff who live and work in Texas are required to drive on a valid Texas driver’s license and are not permitted to drive on an out-of-state license.
- Faculty and staff whose permanent residence and primary work location are outside Texas may drive on a valid out-of-state driver’s license and submit an out-of-state driving record.
- Student workers and sponsored student drivers whose permanent residence is outside Texas may drive on a valid out-of-state driver’s license and submit an out-of-state driving record.
-
I am faculty or staff who just moved to Texas to work for TXST. Do I need a Texas driver’s license?
Yes. For faculty and staff who moved to Texas to work at TXST, state law allows you to drive on a valid out-of-state license for up to 90 days after your move (see DPS Moving to Texas) . After that, you must transfer your out-of-state license to a Texas driver’s license.
During that 90-day window, you may upload an out-of-state driving record for temporary approval, but you must update your license information in the SAP Update Driver Information once you receive your Texas license.
-
I am an out-of-state student driving for TXST. Do I need a Texas driver’s license?
Out‑of‑state students who are not Texas residents may generally drive in Texas on a valid license from another U.S. state and must obtain a Texas license only if they become Texas residents (for example, by moving here permanently).
-
I work for TXST outside Texas. Do I need a Texas driver’s license?
If your permanent residence and primary work location are outside Texas, you may drive for TXST on a valid out-of-state driver’s license, as long as you meet all university driver eligibility requirements.
Step 2: Records
Get your non-certified driving record from the state that issued your license.
Out-of-state drivers can obtain a non-certified record directly from their state's licensing agency, typically via their website or mail.
Your non-certified driving record must:
- Show at least the last three years of your driving history from the state that issued your license.
- Match your legal name and date of birth on file with TXST.
- Come directly from the official state driver licensing agency.
- Be requested recently (within the last 30 days) so it reflects your current record.
If your driving record does not meet these requirements, Fleet Services will notify you and you will need to request and upload a new record before your TXST driving approval can be completed.
Step 3: SAP
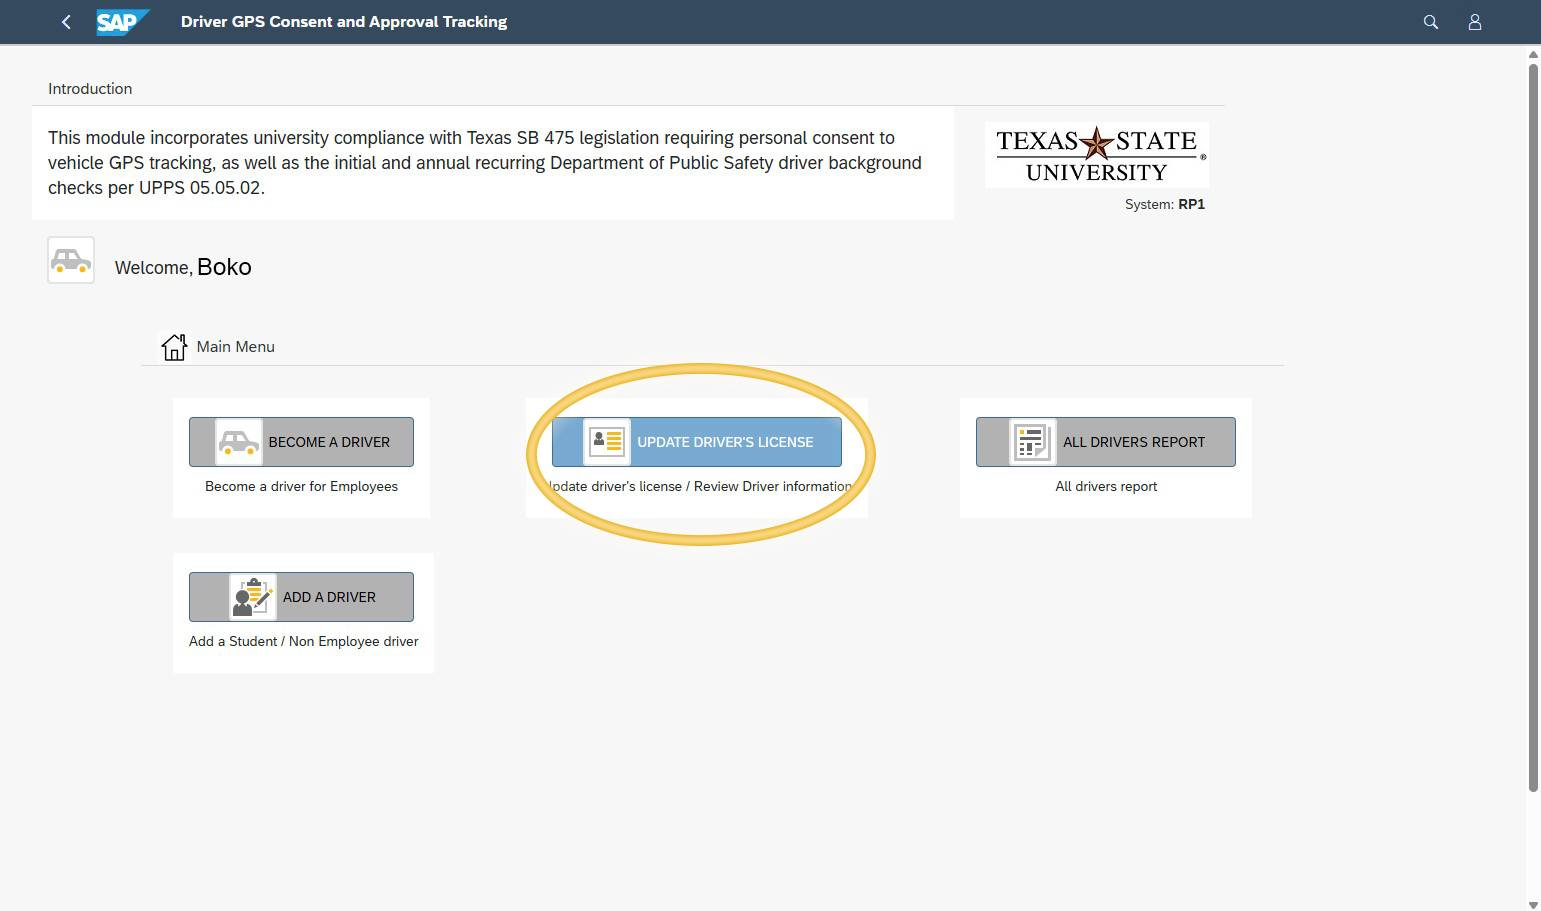
Update driver license information in SAP
- Log into the SAP Portal
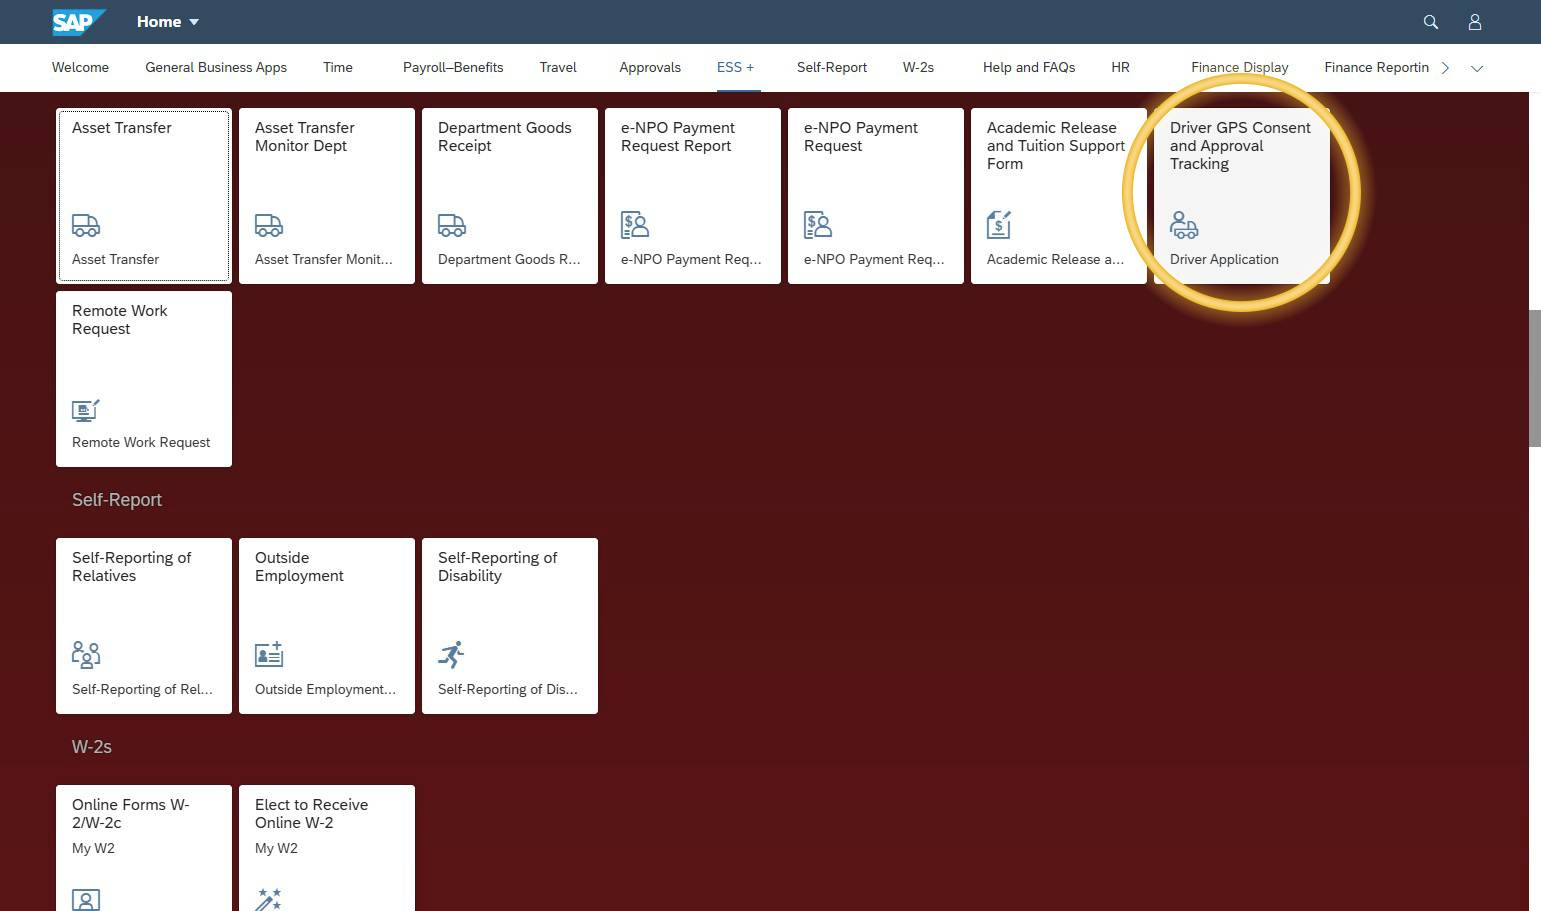
- Navigate to ESS+
- Select GPS Consent & Approval Tracking
- Select Update Driver’s License.
Step 4: Upload
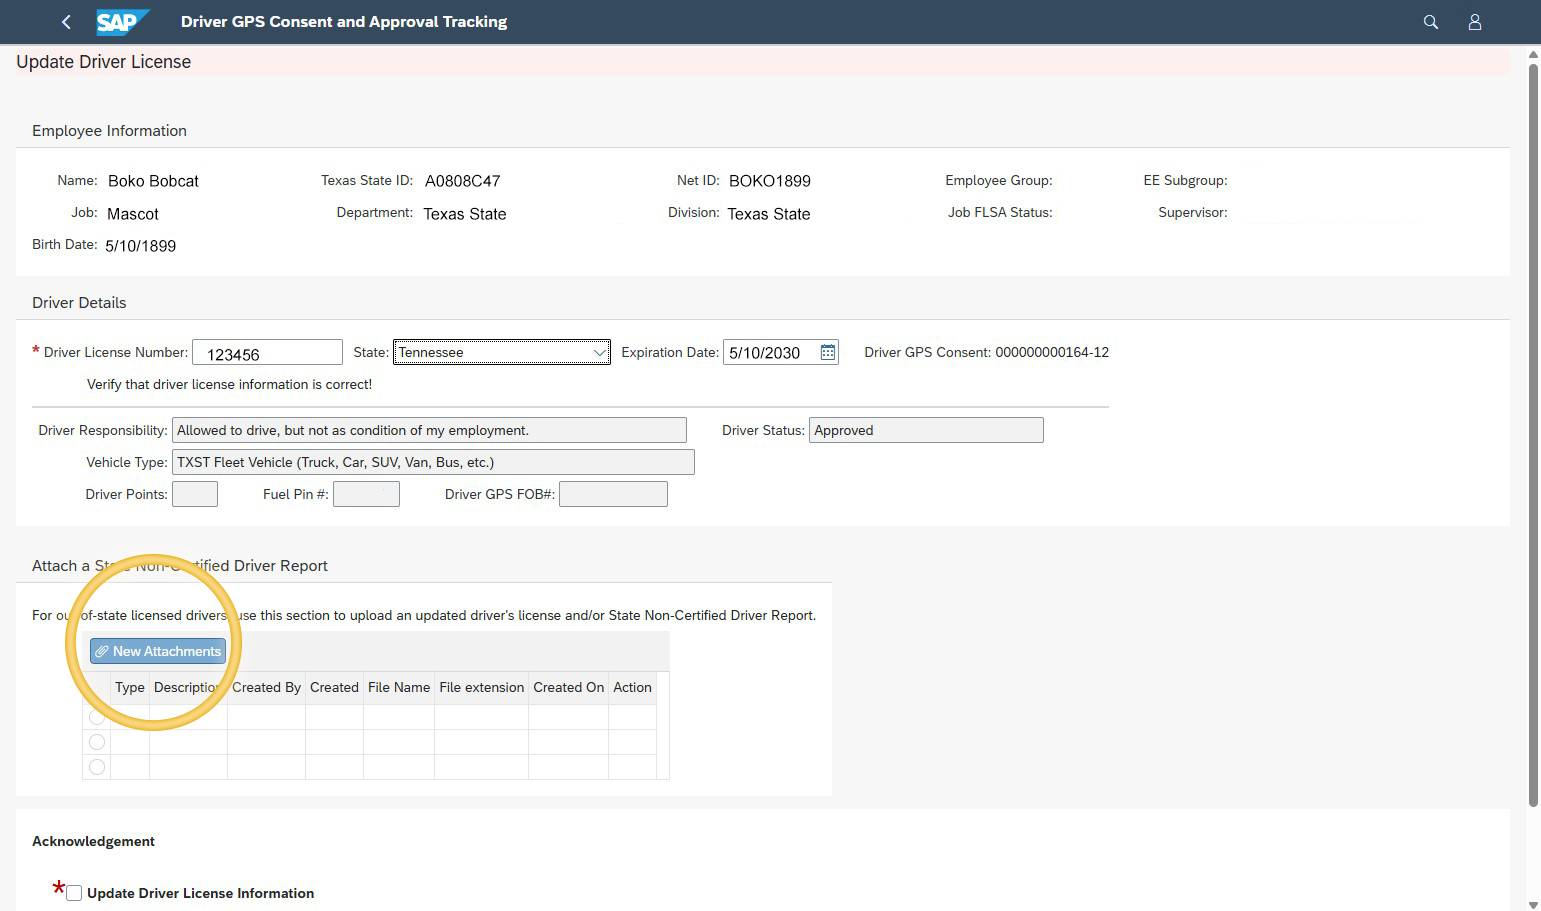
Upload your record.
- Click the New Attachments button.
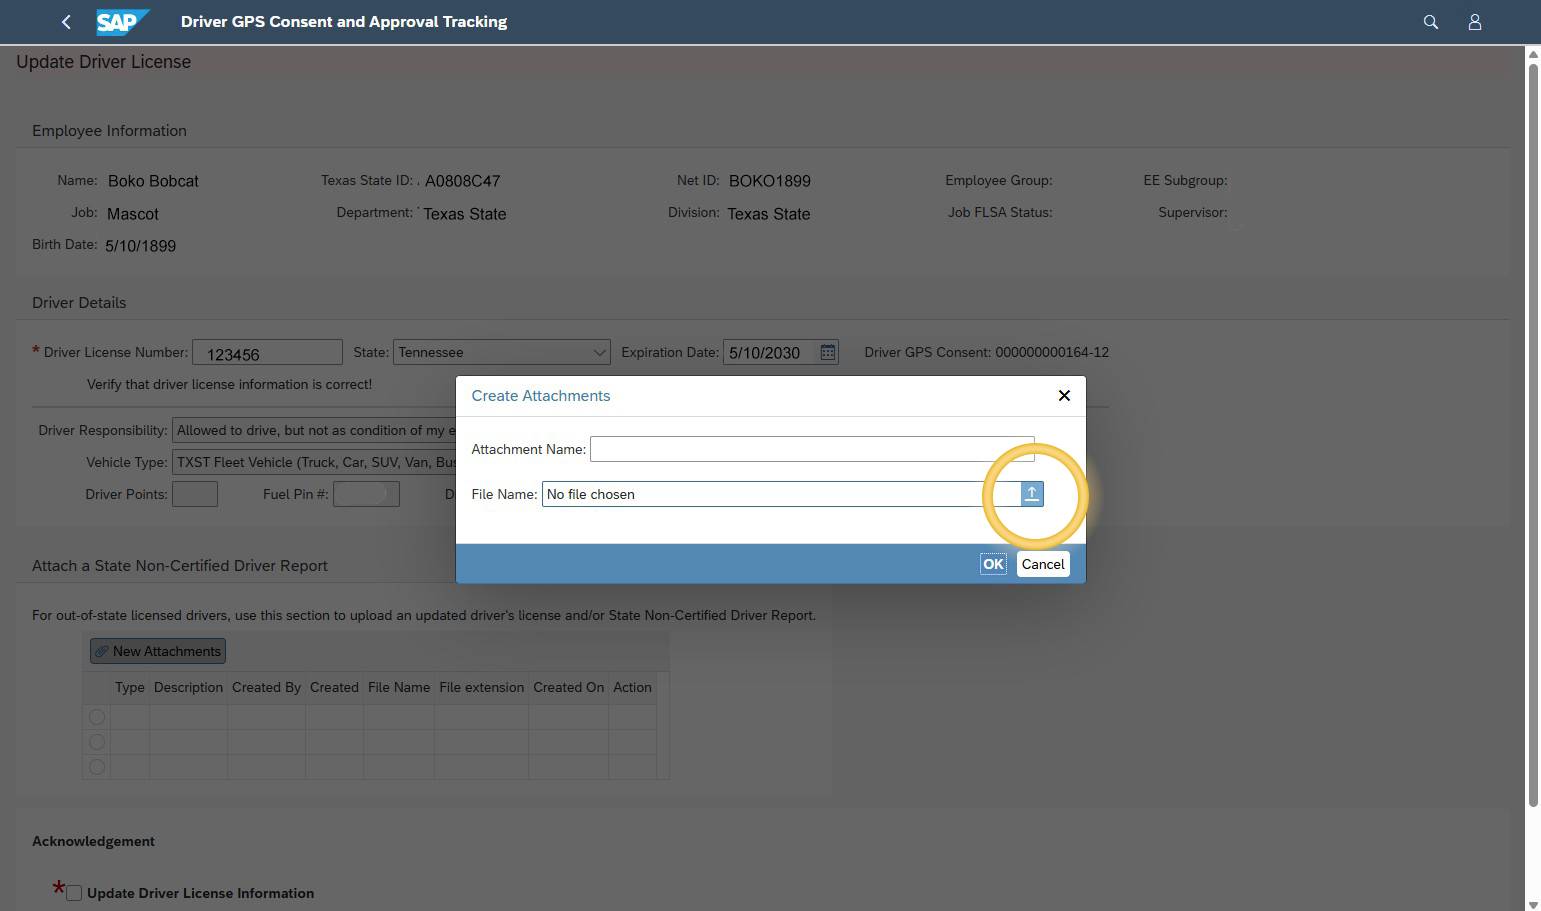
- The Create Attachments window will open.
- In the File Name box, click the upload arrow (browse button).
- The File Upload window will open.
- Go to the folder where you saved your non-certified driving record.
- Click the file for your non-certified driving record.
- Click Open to upload your file.
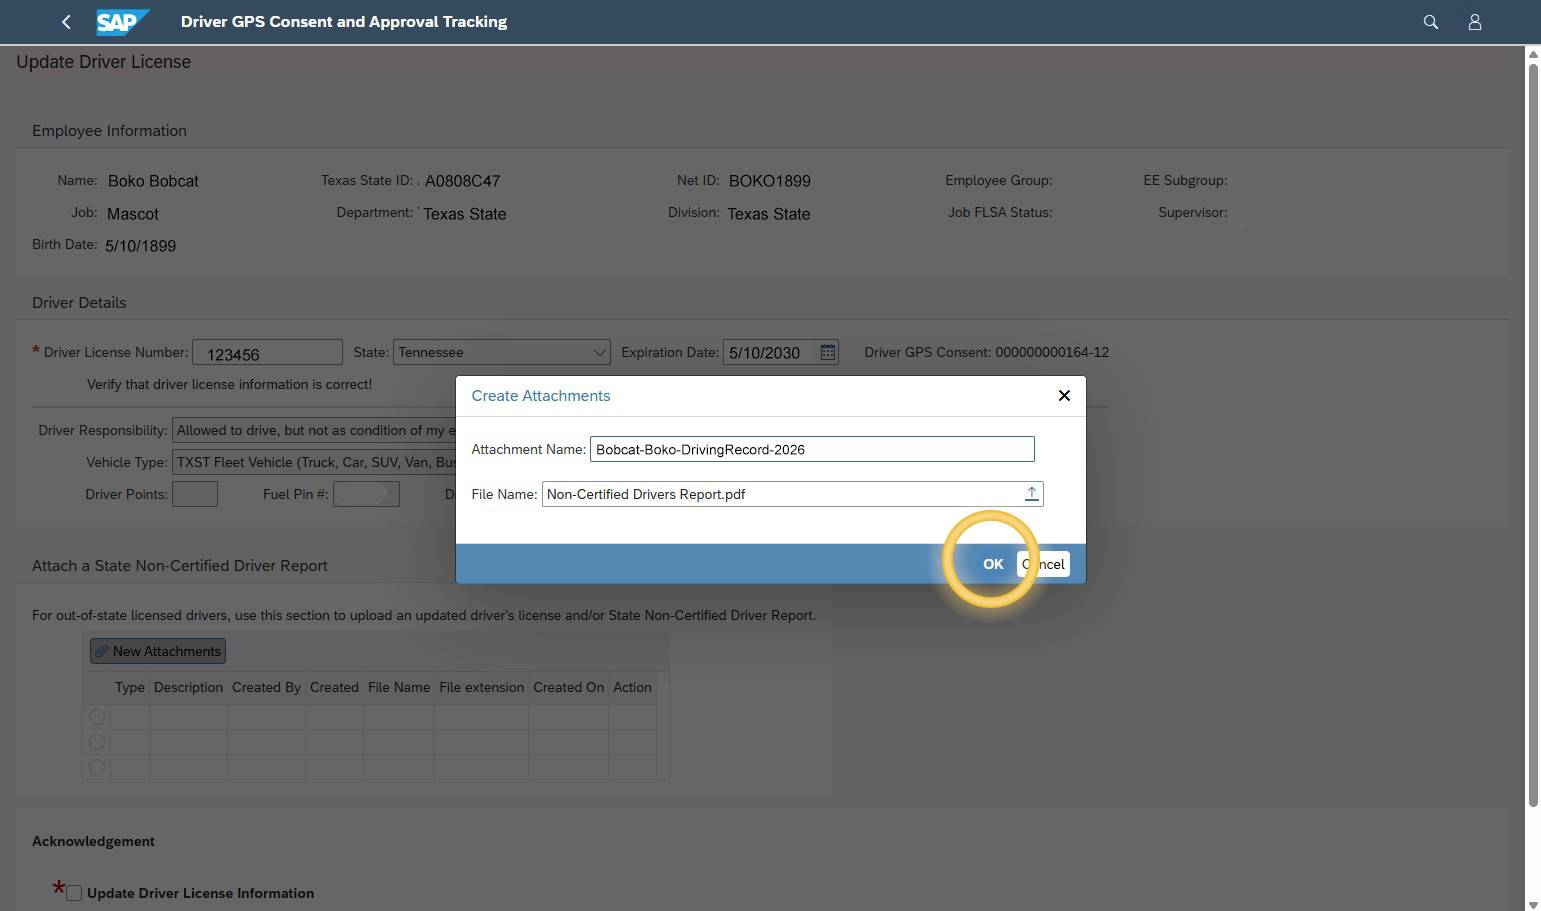
- The File Upload window will close and you will return to the Create Attachments window.
- Type a name for your file in the Name box.
- Optional, but recommended.
- Use something like: netid - Driving record - 2026.
- Click OK.
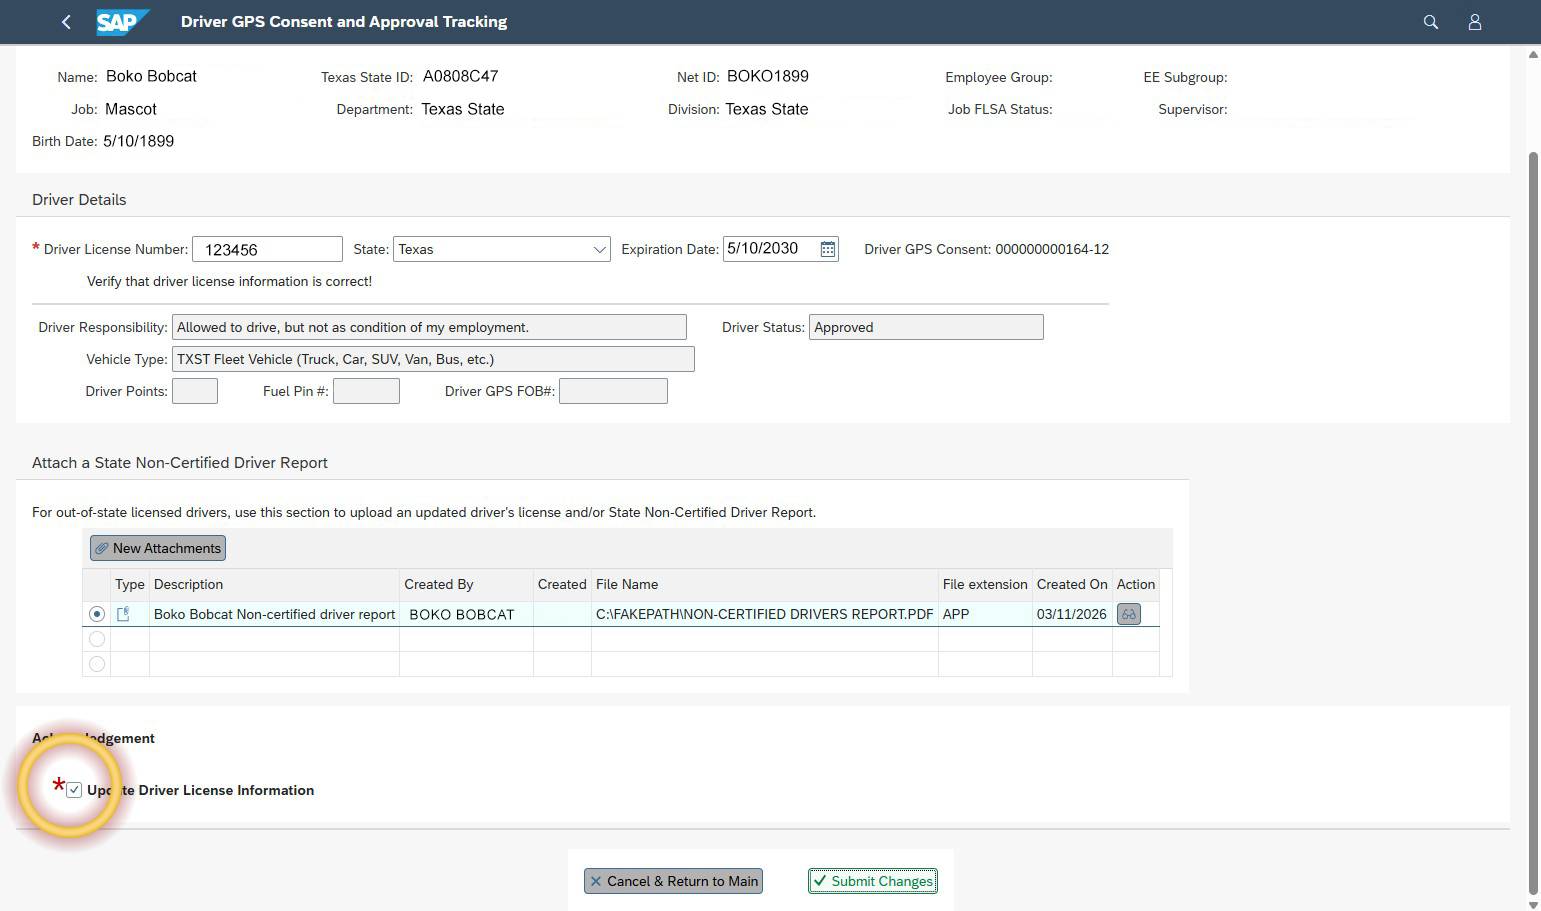
- Your file should now appear in the Attachments table.
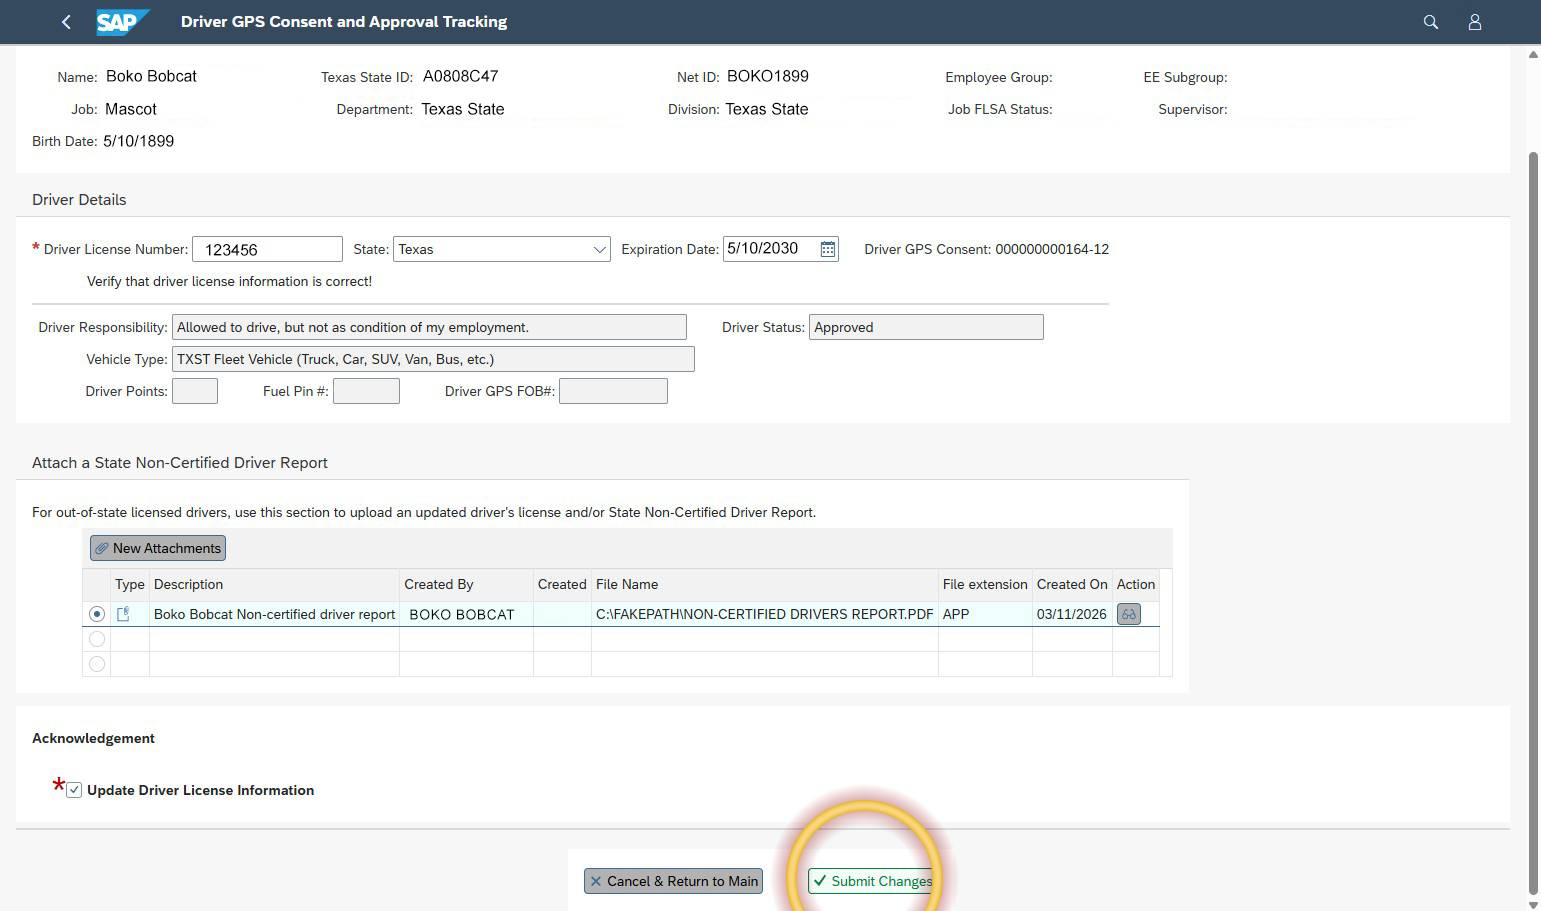
- Check the Update Driver License Information box to certify that this is your true and complete non-certified driving record.
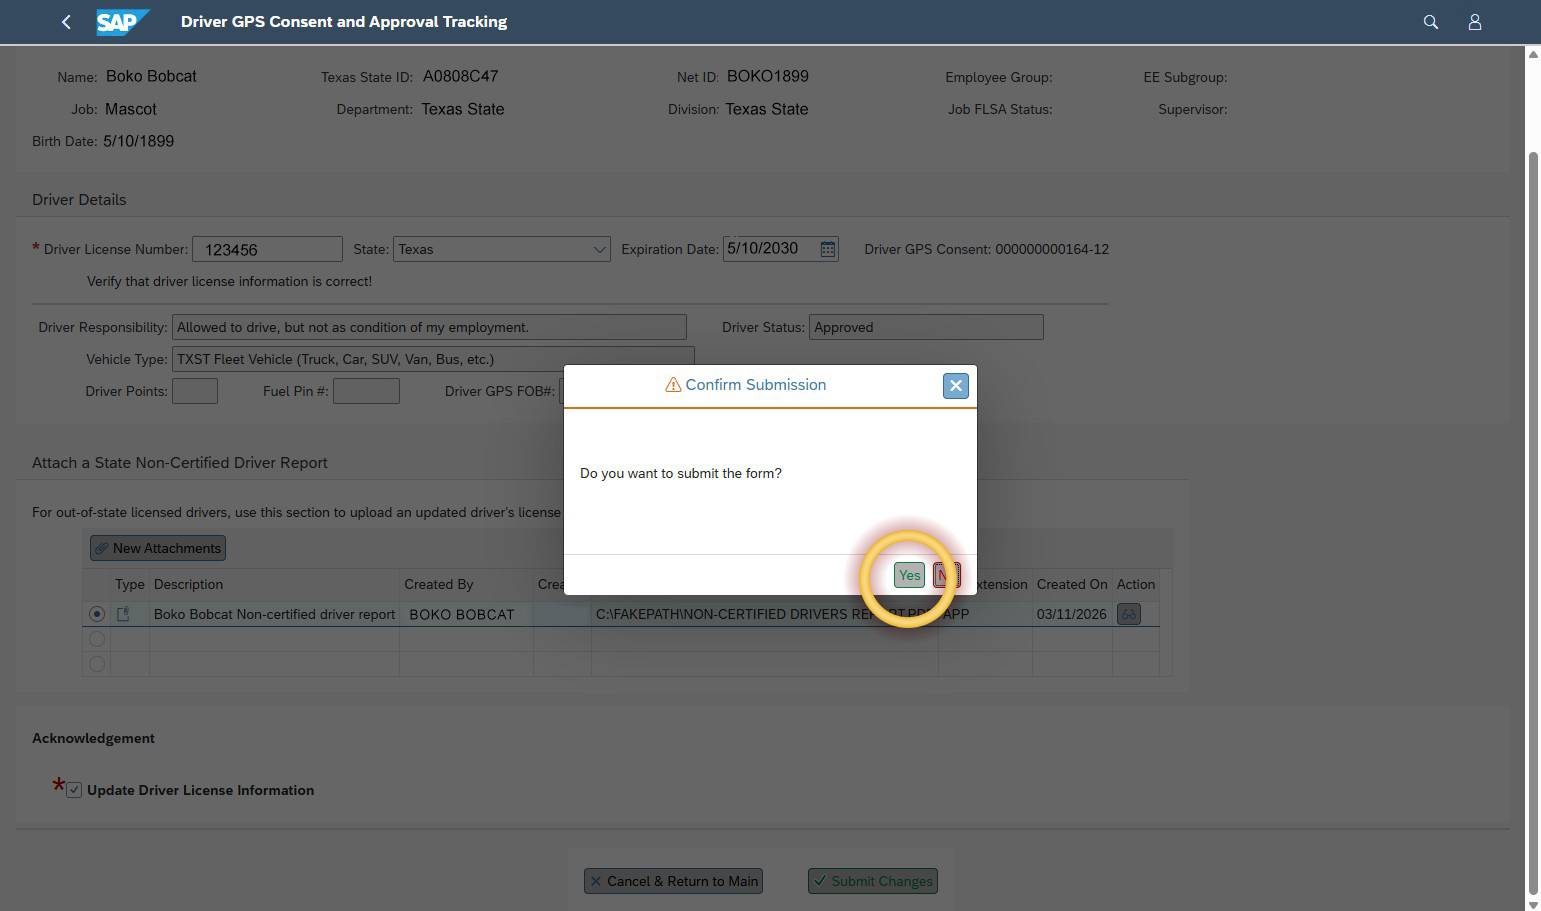
- Click the Submit Changes button.
- The Confirm Submission window will open.
- Click Yes to submit the form.
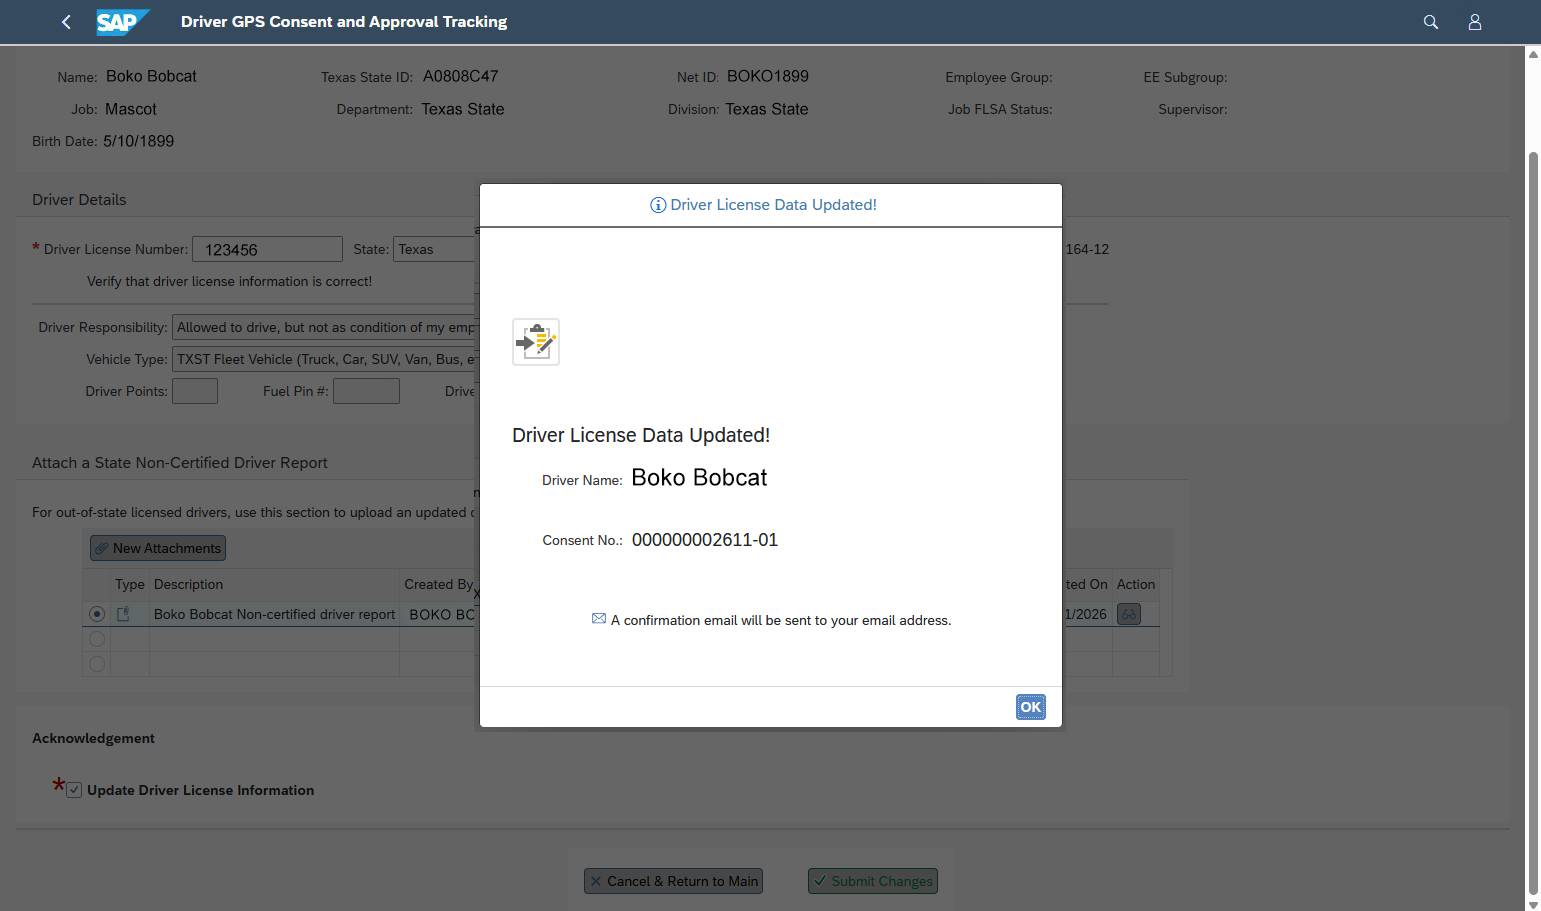
- The Driver License Data Updated! window should open to confirm your submission.